To use this site, please disable the ad blocking feature and reload the page.
This website uses cookies to collect information about your visit for purposes such as showing you personalized ads and content, and analyzing our website traffic. By clicking “Accept all,” you will allow the use of these cookies.
Users accessing this site from EEA countries and UK are unable to view this site without your consent. We apologize for any inconvenience caused.
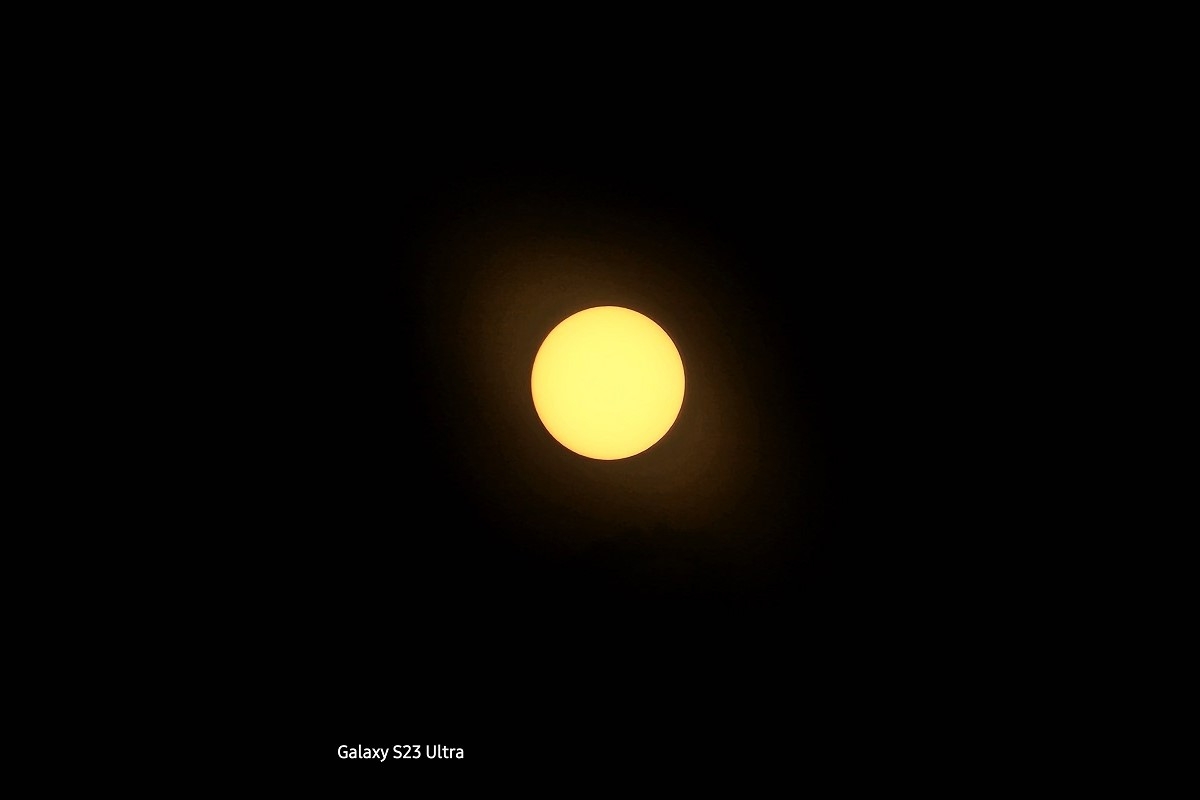
Chris Velazco/The Washington Post Using a solar filter reduces the amount of light entering the camera, so you can actually see the shape of the sun.
The Washington Post / Chris Velazco, William Neff
13:13 JST, March 25, 2024
For about 4½ minutes on April 8, millions of Americans will see their Monday plunge prematurely into darkness.
If you’re lucky – or if you’ve planned a trip into the path of this year’s total eclipse – you’ll be among them. And what better way to mark the moment than with a few gorgeous eclipse pics?
The catch: Capturing worthwhile images of basically anything in space with a phone can be tricky, especially when your subject is a massive, incandescent ball of gas. Need proof? Go outside, try taking a picture of the midday sun, and see whether you capture anything more than just indistinct brightness.
Thankfully, taking photos of a total eclipse is easier than you might expect – as long as you’re prepared. Here’s how you might be able to get a few stunning eclipse pictures for your records without hurting yourself, or your phone.
1. What you’ll need
– Your smartphone. To get as up-close a picture as possible, use your phone’s telephoto (also known as zoom) camera if it has one. The iPhone 15 Pro, for instance, has a telephoto camera with a 3x optical zoom – which will provide the best visual quality – and up to 15x digital zoom if you’re okay with less crisp results. Samsung’s Galaxy S Ultra phones offer between 3x and 10x optical zoom, but a built-in Space Zoom feature means you can push in as far as 100x.
If your phone doesn’t have a telephoto camera, or if you want even more range, consider using a telephoto lens attachment. In general, these cost between $30 and $50, and if you are considering buying one, search for a lens that offers the most magnification possible.
– A tripod. This can help in a few ways: It will keep your phone framed just right, reduce the possibility of a sneeze or a gust of wind messing up your photo, and keep you from having to look in the direction of the sun before the moon passes fully in front of it.
– A solar filter. This will dramatically reduce the amount of light that enters your phone’s camera and help to protect the precious sensor inside.
You won’t need it during totality – the money-shot moment when the moon is sitting directly in front of the sun – but it’s crucial for the moments before and after when the sun is only partially obscured.
– A way to mount the filter. If you’re using a small sheet and relying on your phone’s built-in cameras, you can easily tape a filter in front of it or hold it in place. You could also use a filter adapter that fits in front of your phone’s lenses that lets you screw in dedicated filters for non-phone cameras.
For the best results, you may also want to consider fitting a bit of black cloth around the filter to minimize the amount of external light that bleeds into your images.
2. Prep work and settings
The totality for this year’s eclipse is expected to last for about 4½ minutes – that’s almost twice as long as 2017’s total eclipse, but still short enough that you won’t want to waste time fiddling with your setup.
Our advice? Get everything set up one day ahead for a practice run to work out any kinks. (This will also help ensure your solar filter is up to the job.) Before your practice run – and the real thing – make sure that your phone’s camera lenses are clean and that your filters are securely attached.
This is also a great time to figure out where your phone’s most helpful camera settings live. If you’re using an iPhone with a solar filter, turn off automatic macro switching; otherwise, the phone may try to focus on the filter instead of the eclipse.
It’s also worth familiarizing yourself with a few of your phone’s other camera tools ahead of time:
– Burst mode lets you snap multiple photos in quick succession. To use it on iPhones, swipe left on the shutter button in the Camera app. For Samsung phones, swipe down on the shutter button.
– Focus lock can keep your phone from trying to focus on anything but the eclipse. On most phones, just press and hold on your subject until you see a lock icon or an indicator that says “AE/AF lock.”
– RAW mode captures an uncompressed version of the image your camera sensor “sees,” which gives you more flexibility when you edit the results. iPhone users will want to ensure ProRAW is enabled, while Samsung owners may want to use the company’s Expert RAW app, which also contains astrophotography tools that could be helpful when shooting during totality.
3. What to do in the moment
Now that you’re familiar with your gear and your settings, it’s time for the real thing. Just remember: Please, please do not look directly into the sun unless you’ve got the proper protection. (We know you know this, but still.)
Here’s what to do next:
– Double-check that your lenses are clean, and wipe them down if they aren’t.
– Attach the solar filter in front of your camera, or in front of the telephoto lens add-on if you’re using one.
– Connect that telephoto lens add-on if needed, according to the instructions that came with it.
– Mount the phone on your tripod and get the sun where you want it in the frame – play with the zoom levels in your phone’s camera app if needed.
– Lock your focus on the sun and set your exposure by dragging your finger up and down on the screen
– Feel free to start snapping photos when the moon starts its transit in front of the sun.
– When totality occurs, you can remove the solar filter. You may also want to take the phone off the tripod for some landscape shots as day temporarily turns to night, but be sure to reattach the filter if you want more partial-eclipse photos when those 4½ minutes are over.
– Remember to tear yourself away from the camera to enjoy the moment for a bit.